
Guides
How to Find Where Your Photos Appear Online
Trying to find where a photo of you appears online? Learn how to search for exact copies, modified versions, different photos of your face, and the webpages behind the results.

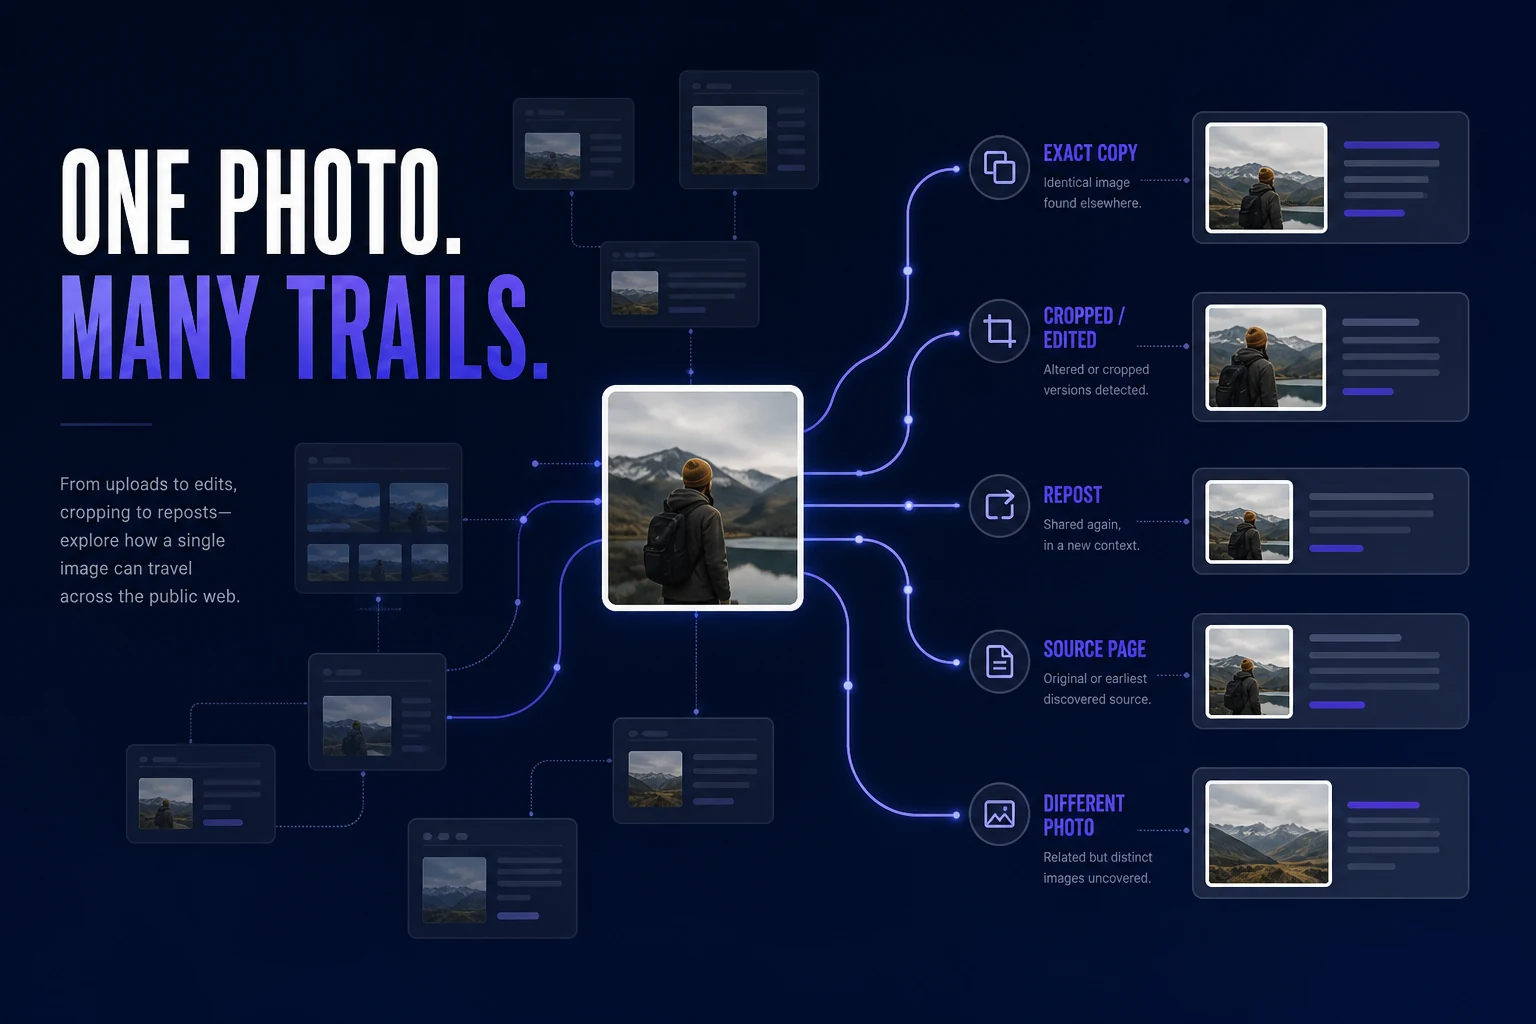
One photo can leave more than one trail across the web.
A picture you posted years ago may have been copied to another website. A cropped version could appear somewhere else. An old profile photo may still be indexed. Or an entirely different photograph of your face could appear on a page that doesn't contain your name.
Finding those images requires more than one kind of search.
Traditional web search can follow names and text. Reverse image search can trace a particular photograph. Facial search can look for visually similar faces across different images.
Used together, they can give you a much better view of where your photos may be publicly discoverable online.
But no method searches the entire internet.
The goal isn't to prove you've found every image.
It's to follow as many useful trails as possible.
First, decide what you're actually trying to find
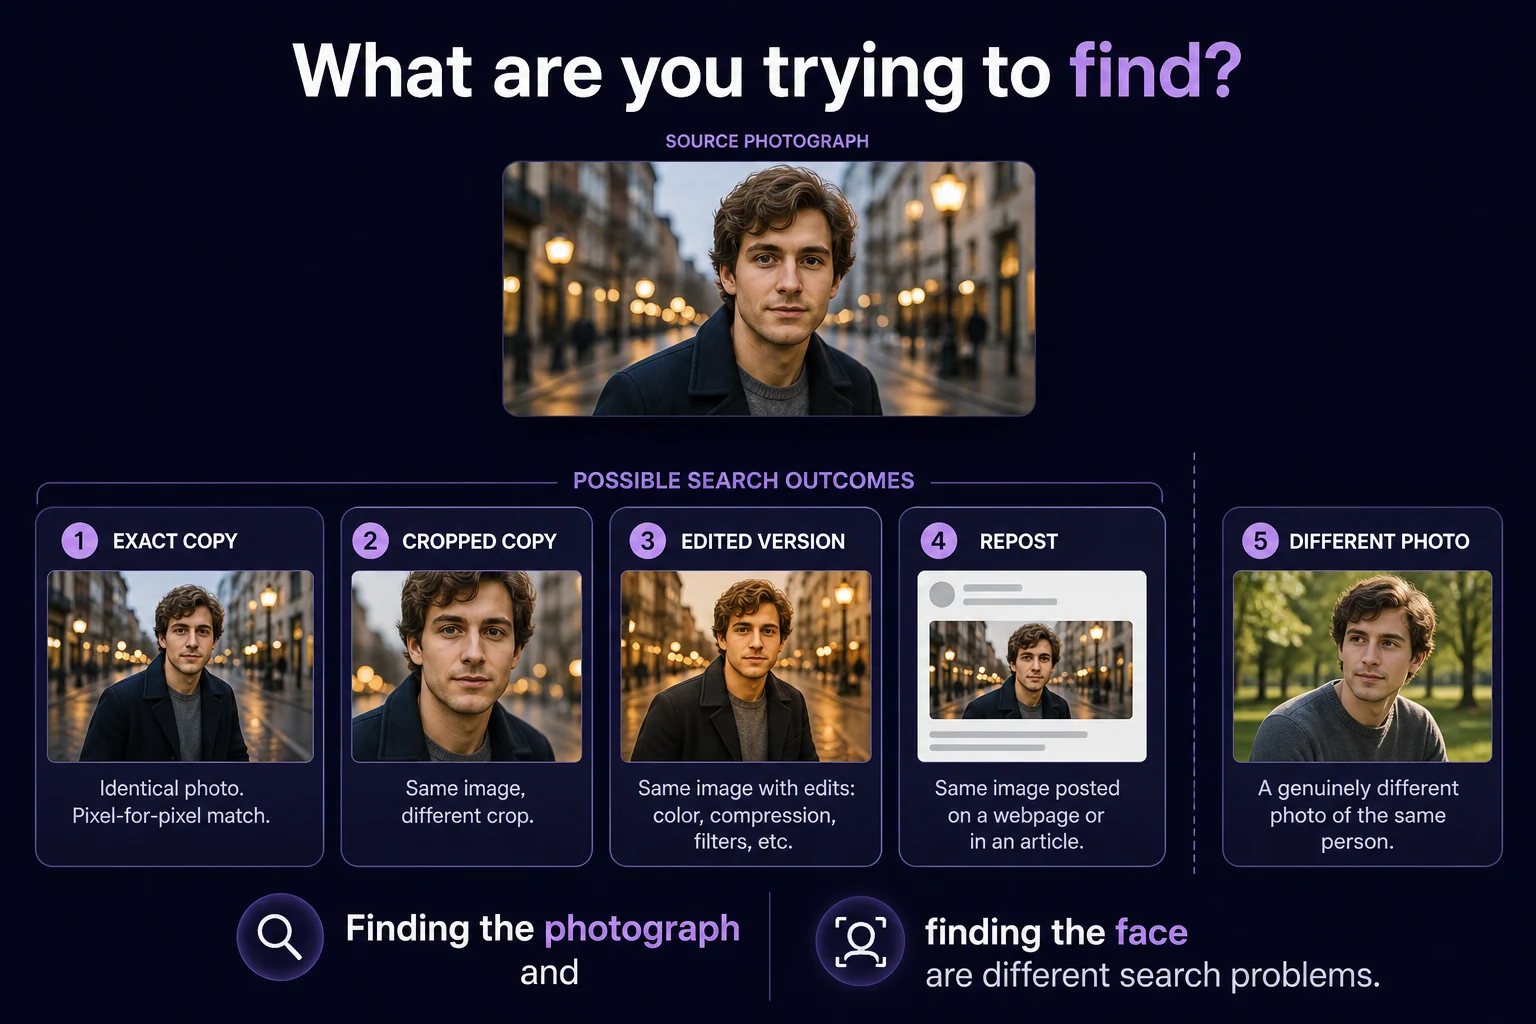
“Where are my photos online?” can mean several different things.
You might be looking for:
The exact same photograph — A copy of an image you already have.
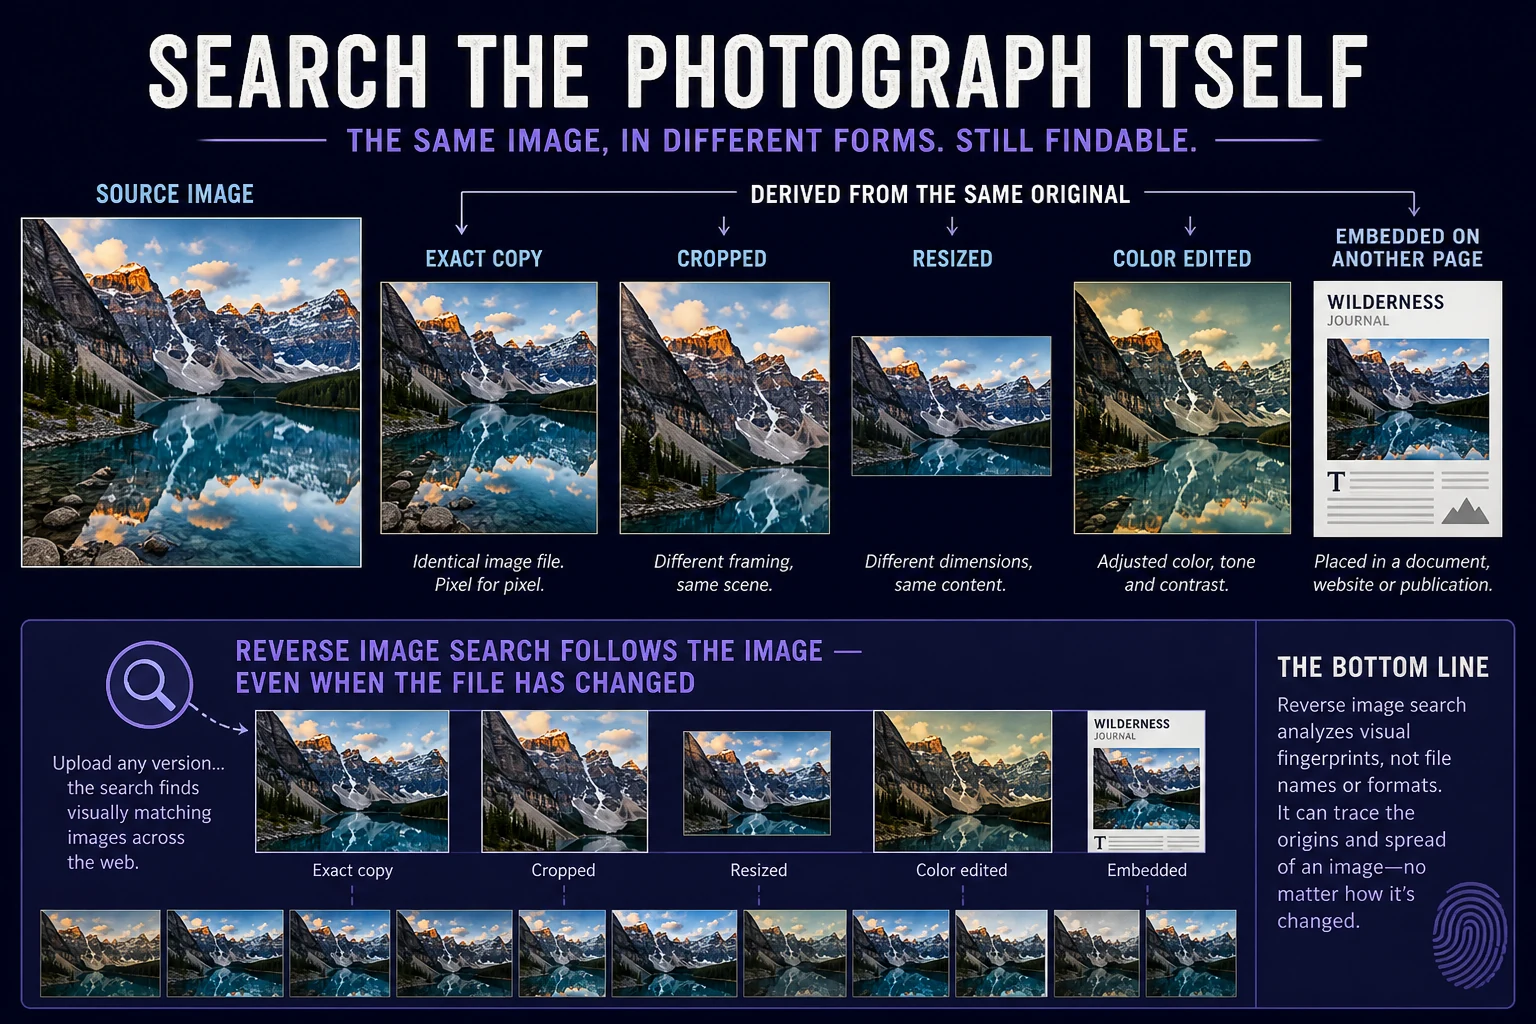
An altered version — The same photograph cropped, resized, compressed, color-adjusted, or otherwise modified.
A repost — Another webpage displaying your photograph.
The original source — An earlier page or location where the image appeared.
Different photographs of you — Images that don't originate from your source photo but may contain your face.
These aren't exactly the same search problem.
And that's why there isn't one universal “search my photo” button that covers everything.
Step 1: Search your name and known identifiers
Before searching by image, start with the obvious.
Search for information that might already be associated with your photos:
your full name;
variations of your name;
usernames you've used publicly;
professional or creator names;
websites or domains associated with you;
distinctive phrases or captions you remember posting with the image.
Try combinations rather than relying on one query.
If your name is common, adding another piece of public context can help narrow the search.
This won't find photographs that aren't connected to searchable text, but it's a useful first layer.
Step 2: Search the actual photograph
Now search with the image itself.
This is reverse image search.
Rather than entering words, you provide a photograph and let the search engine look for visually related imagery and webpages.
Different services approach this differently.
Google Lens can return similar images and websites containing the image or a similar image.
Bing Visual Search can return pages using an image as well as related images and other visual information.
TinEye is particularly focused on tracing an image itself. TinEye says it can help locate where an image appears, modified versions, earlier occurrences, and higher-resolution copies.
Yandex Images is another image-search option worth checking because different engines maintain different indexes.
Not sure how this differs from facial search? See Reverse Face Search vs. Reverse Image Search.
Step 3: Don't stop after one reverse image engine
This is important.
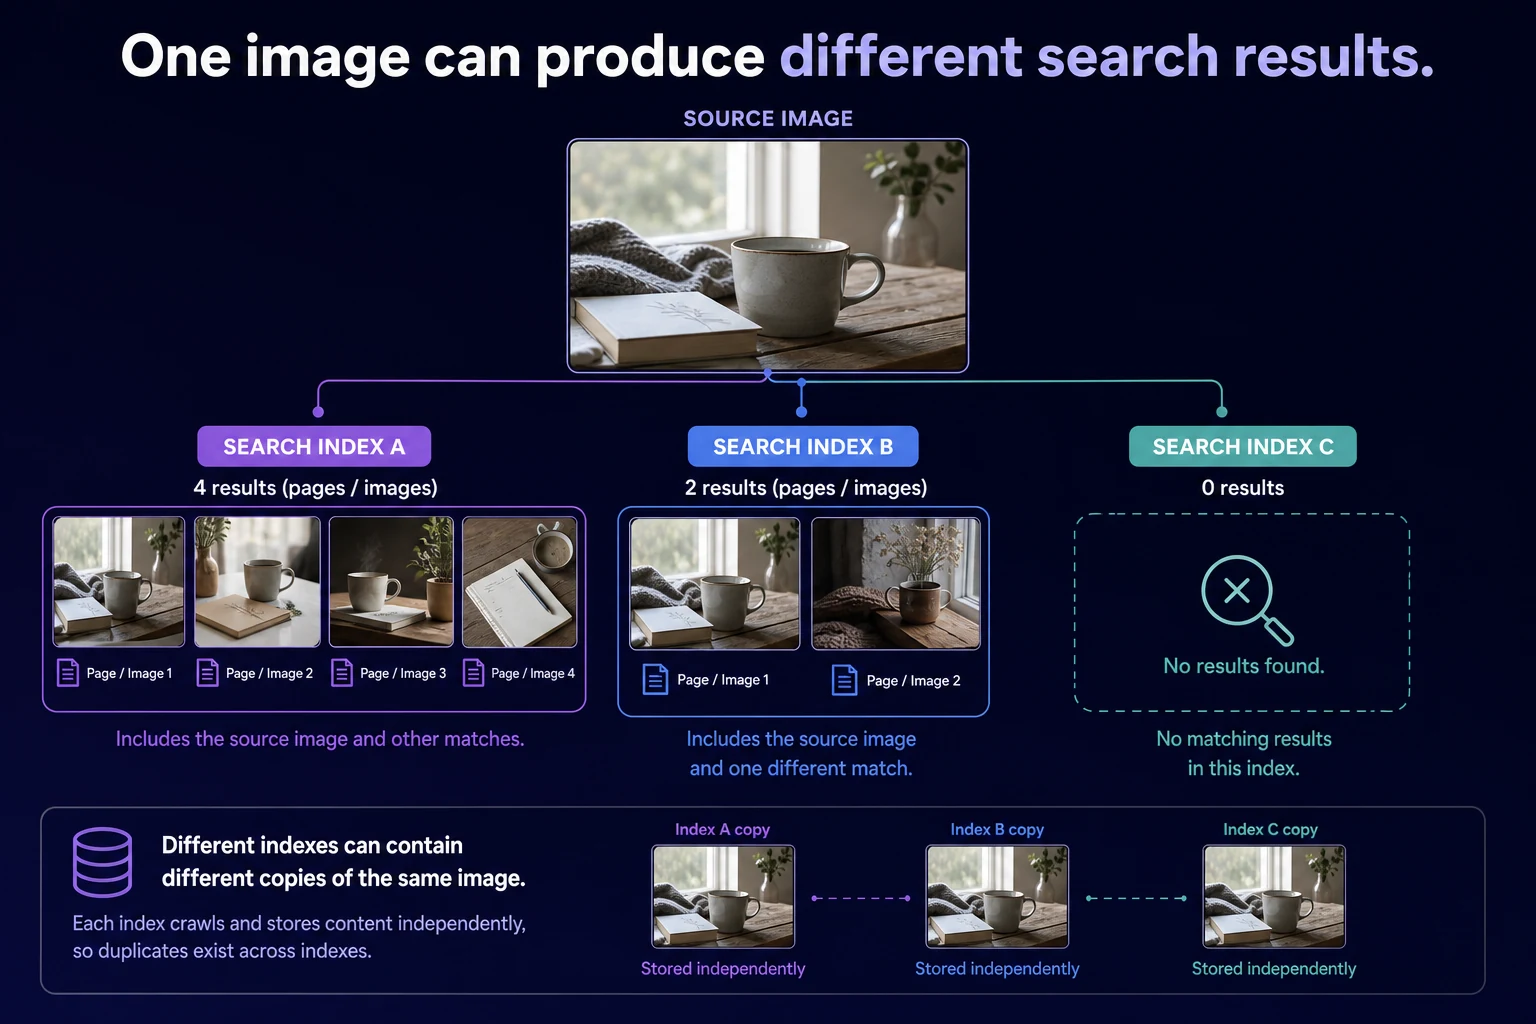
Different search engines maintain different indexes and use different visual-search systems.
That means:
No results from one provider doesn't mean another provider will return nothing.
Run the photograph through more than one service when the image matters enough to investigate thoroughly.
You may find that one engine locates an exact copy, another finds a cropped version, and another returns nothing useful.
That's not necessarily evidence that one engine is universally “better.”
They may simply have access to different searchable imagery.
Step 4: Try different versions of the photograph
If you have the original image, search it first.
Then consider variations.
A version that was actually posted online may differ from your original because a website:
resized it;
recompressed it;
changed its format;
cropped it;
stripped metadata;
created a thumbnail.
You can also try searching a clean crop of the most distinctive portion of the photograph.
Don't go crazy editing the image, though. You're trying to help a search system locate existing visual relationships — not manufacture a completely new image.
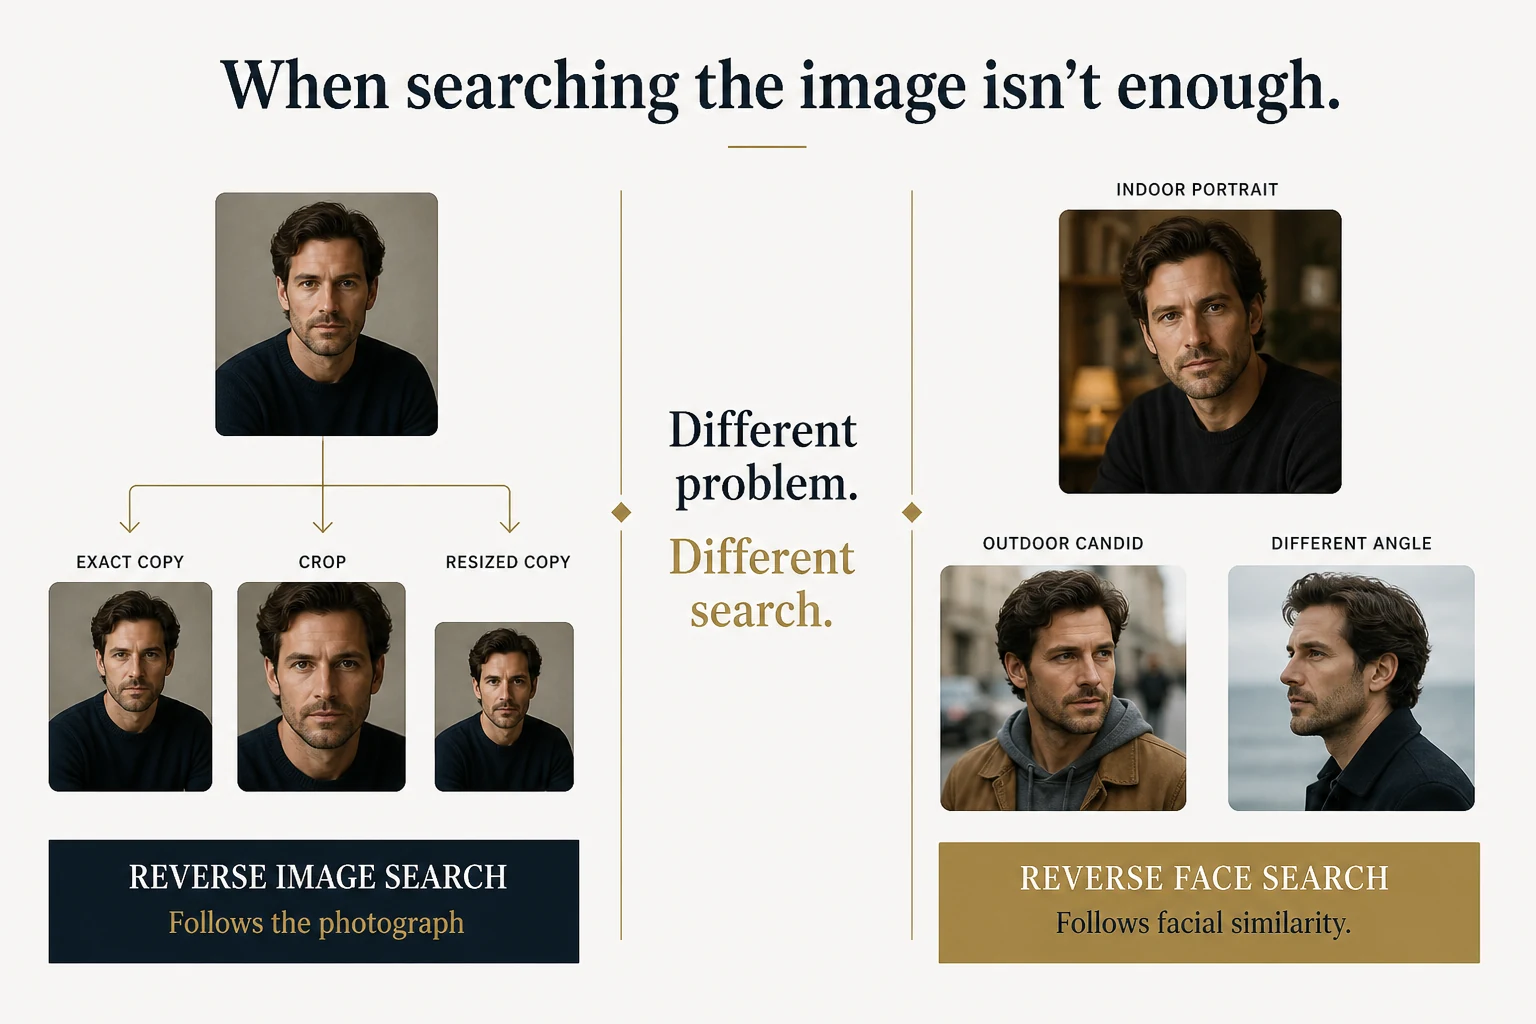
Step 5: Search the face when the photograph isn't enough
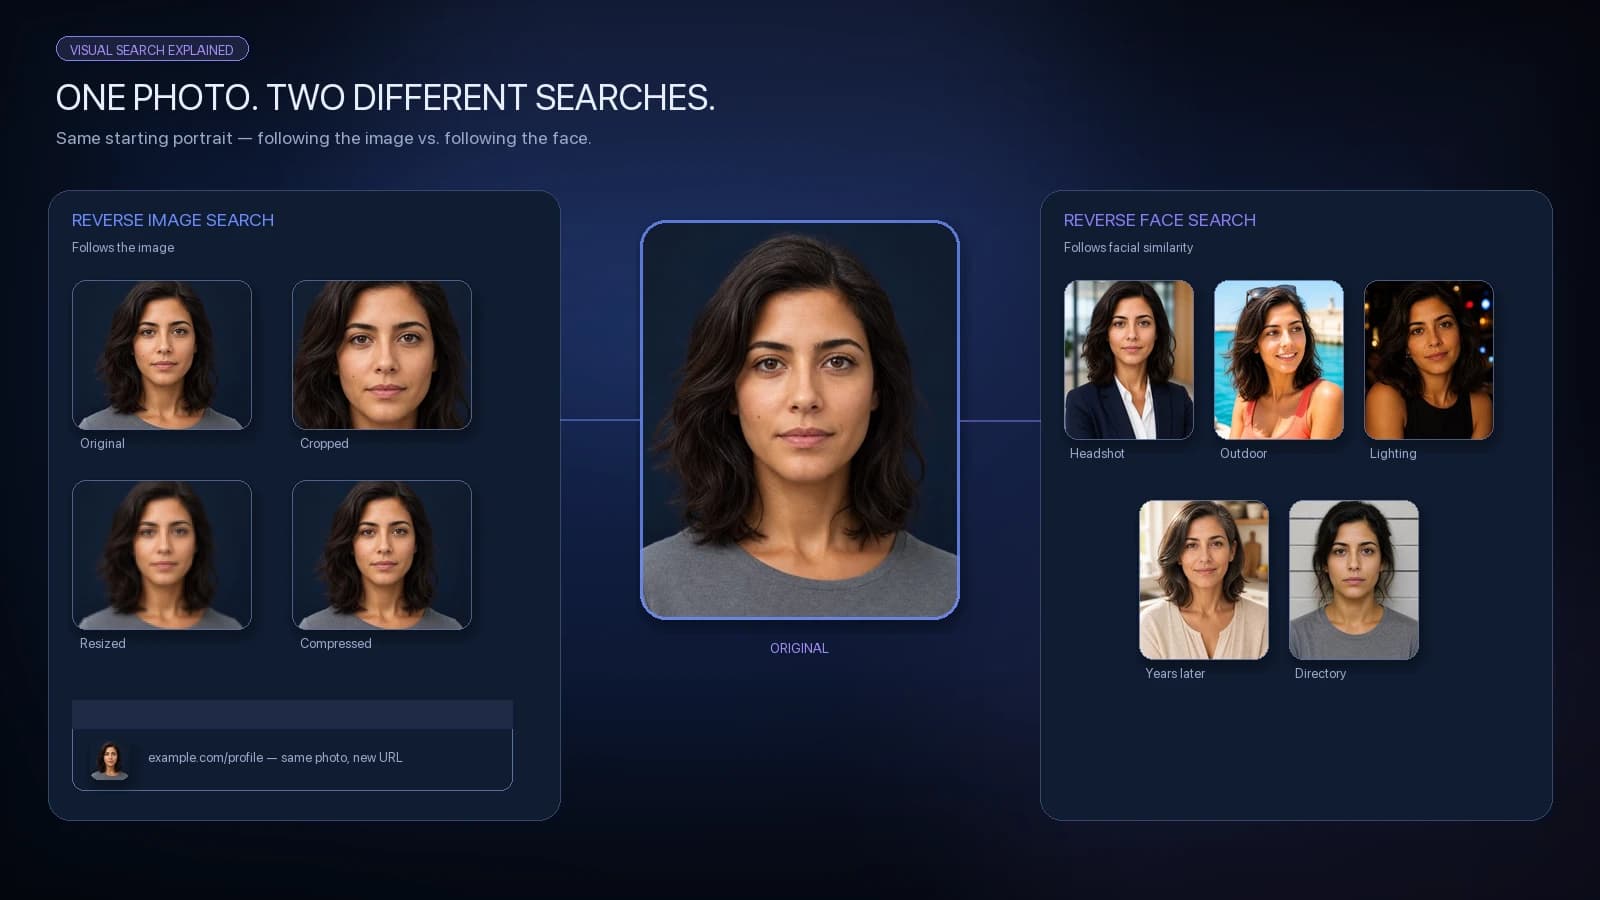
Reverse image search is excellent when you're asking:
"Where else does this photograph appear?"
But imagine someone took a completely different photograph of you.
Different day. Different camera. Different clothing. Different background.
That new photograph isn't a copy of your original image.
Traditional reverse image search may have little reason to associate the two.
A reverse face search approaches the problem differently by comparing facial representations across photographs.
That allows a dedicated face-search system to potentially surface different publicly indexed photos containing a visually similar face.
If you're trying to understand your own public visual footprint, that can reveal a different layer than searching the photograph alone.
Learn more in How Reverse Face Search Works and How to Search the Internet for Your Own Face.
Step 6: Open the source page
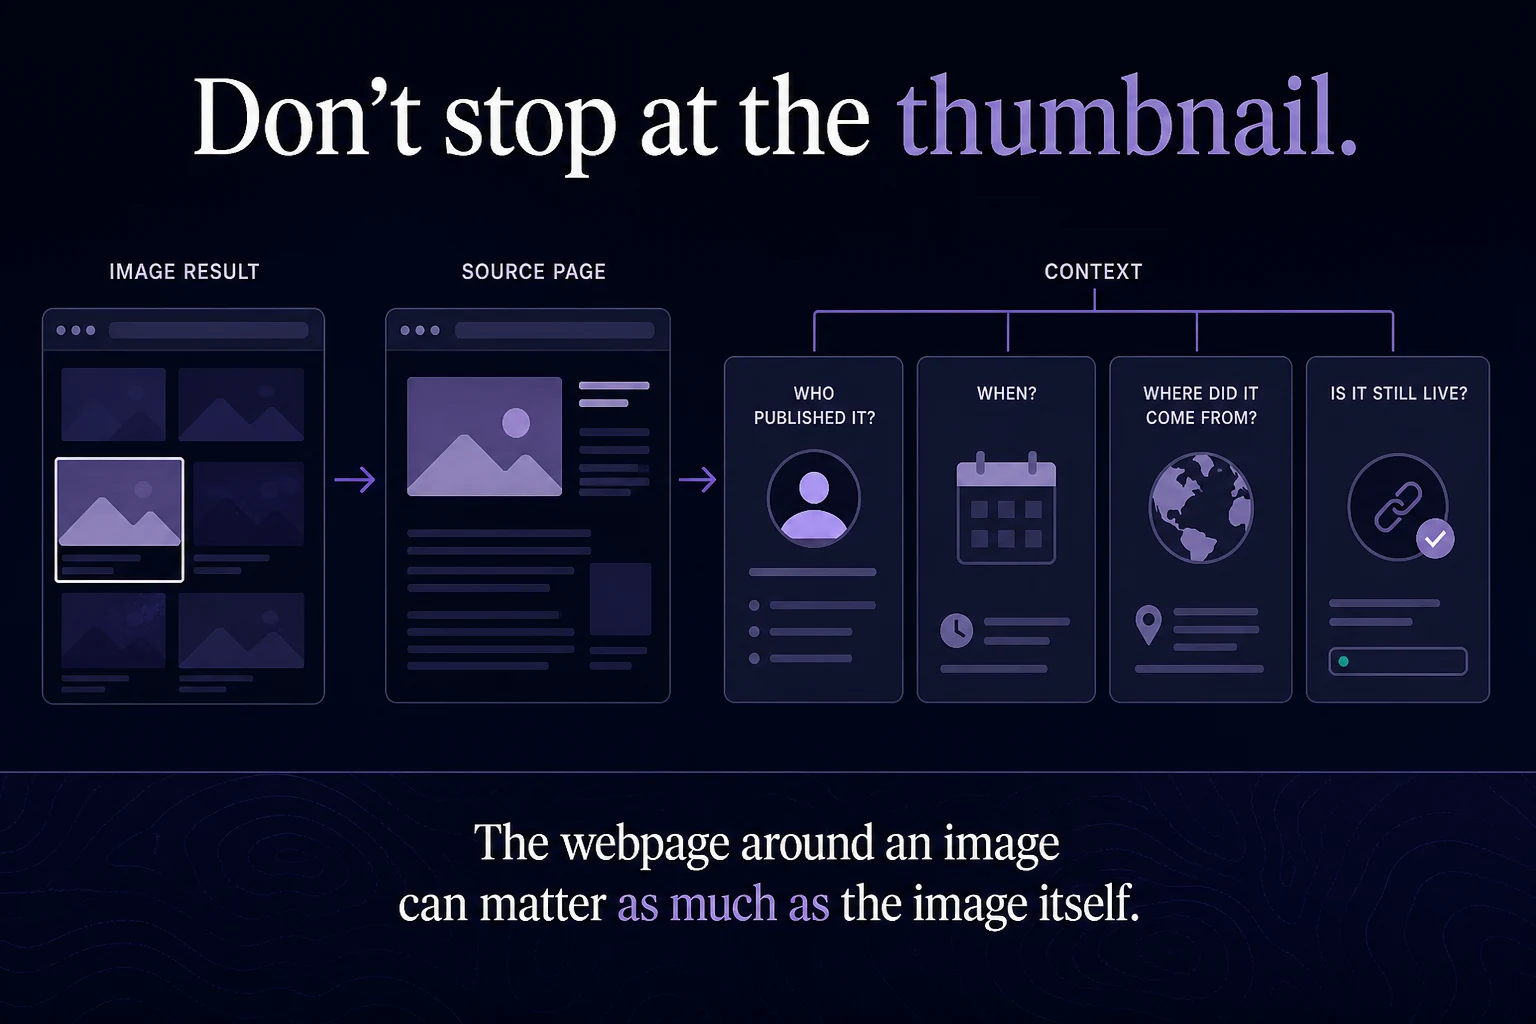
Finding a thumbnail isn't the end of the investigation.
Open the webpage where the image appears.
The surrounding page can answer questions the image result can't:
Who published it?
What does the page say about it?
Is your name attached?
Is it an original upload or a repost?
Does the page link somewhere else?
Is the image still live?
Is there a date?
Is there contact or removal information?
This is especially important with facial-search results.
A visually similar face by itself provides very little context.
The source page tells you why that image is there.
Step 7: Work backward toward the original source
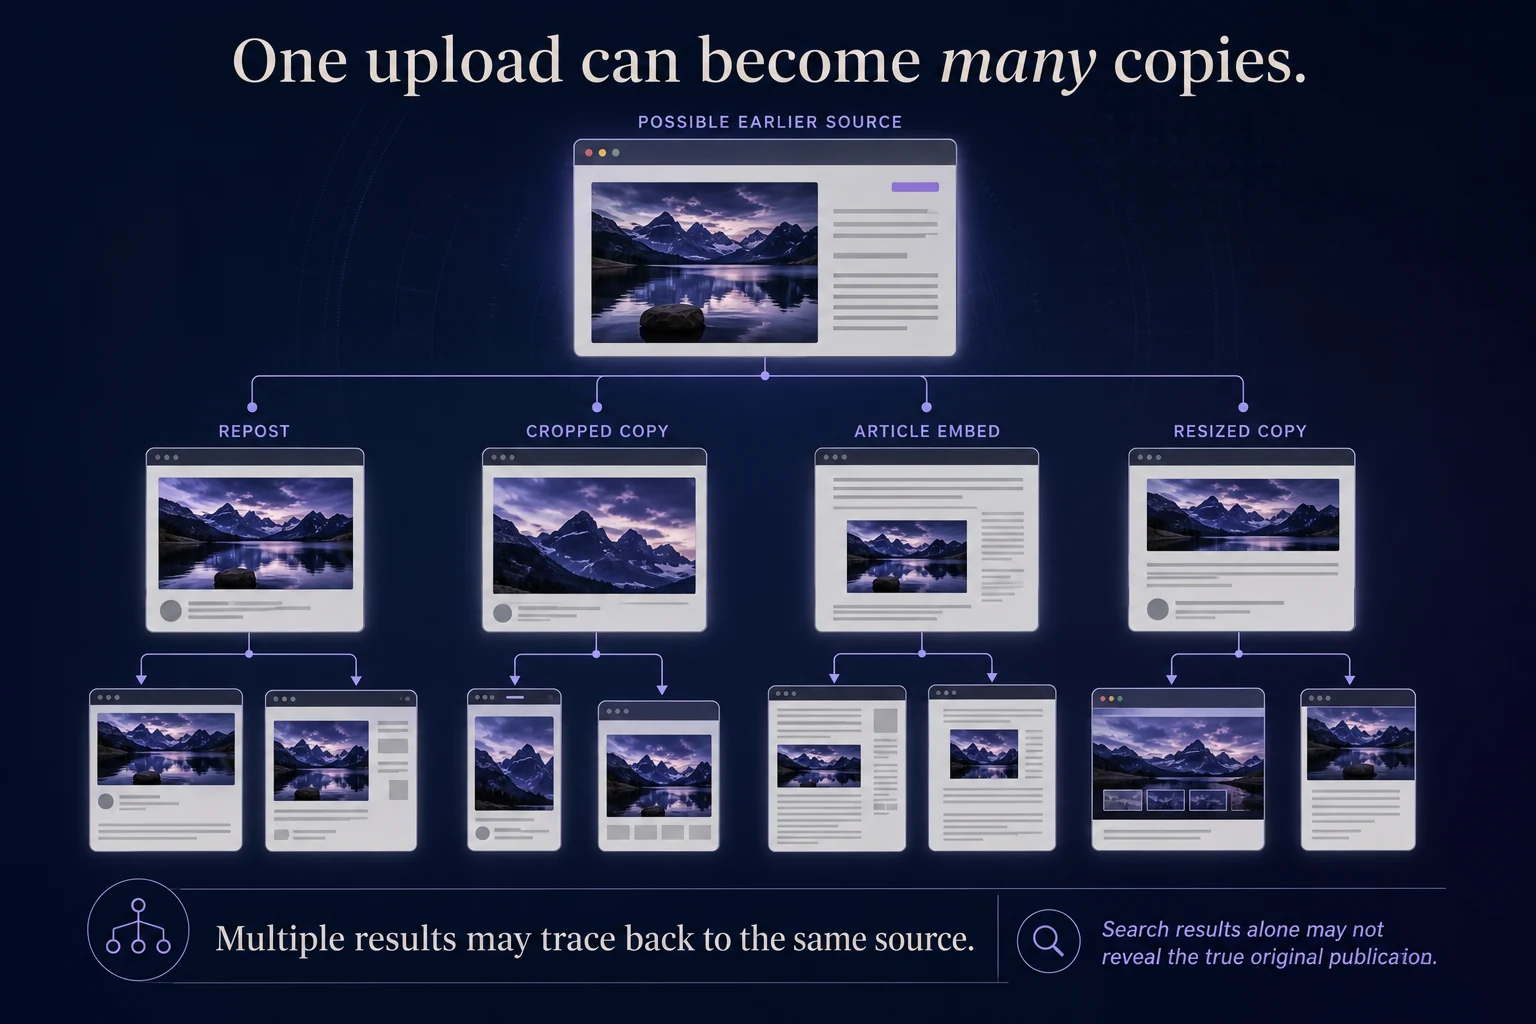
Finding five webpages containing your photograph doesn't necessarily mean five unrelated people uploaded it.
One site may have copied another.
Then another site may have copied that one.
Try to work backward.
Look for:
Earlier publication dates — An older page may be closer to the original source.
Higher-resolution versions — A larger or less compressed version can sometimes indicate an earlier copy.
Attribution — Captions, photographer credits, usernames, filenames, or source links can provide clues.
Repeated context — If several pages use identical text alongside the image, they may originate from the same source.
TinEye's sorting tools are particularly relevant here because it lets users sort toward first-crawled, most changed, newest-found, or largest versions of an image.
But be careful with dates:
The earliest result you find isn't necessarily the first place the photograph ever appeared.
Search indexes don't know the entire publication history of every image.
Step 8: Keep track of what you find
If you're doing more than a casual search, don't rely on memory.
Save:
The source URL
The webpage title
The date you found it
Which search method surfaced it
A screenshot if appropriate
Whether the image is still live
This becomes particularly useful if you later want to request removal.
A search result can change or disappear.
Having a record of what you found gives you a much clearer picture of your search.
What if you find nothing?
Don't make the mistake of concluding:
"My photo isn't anywhere online."
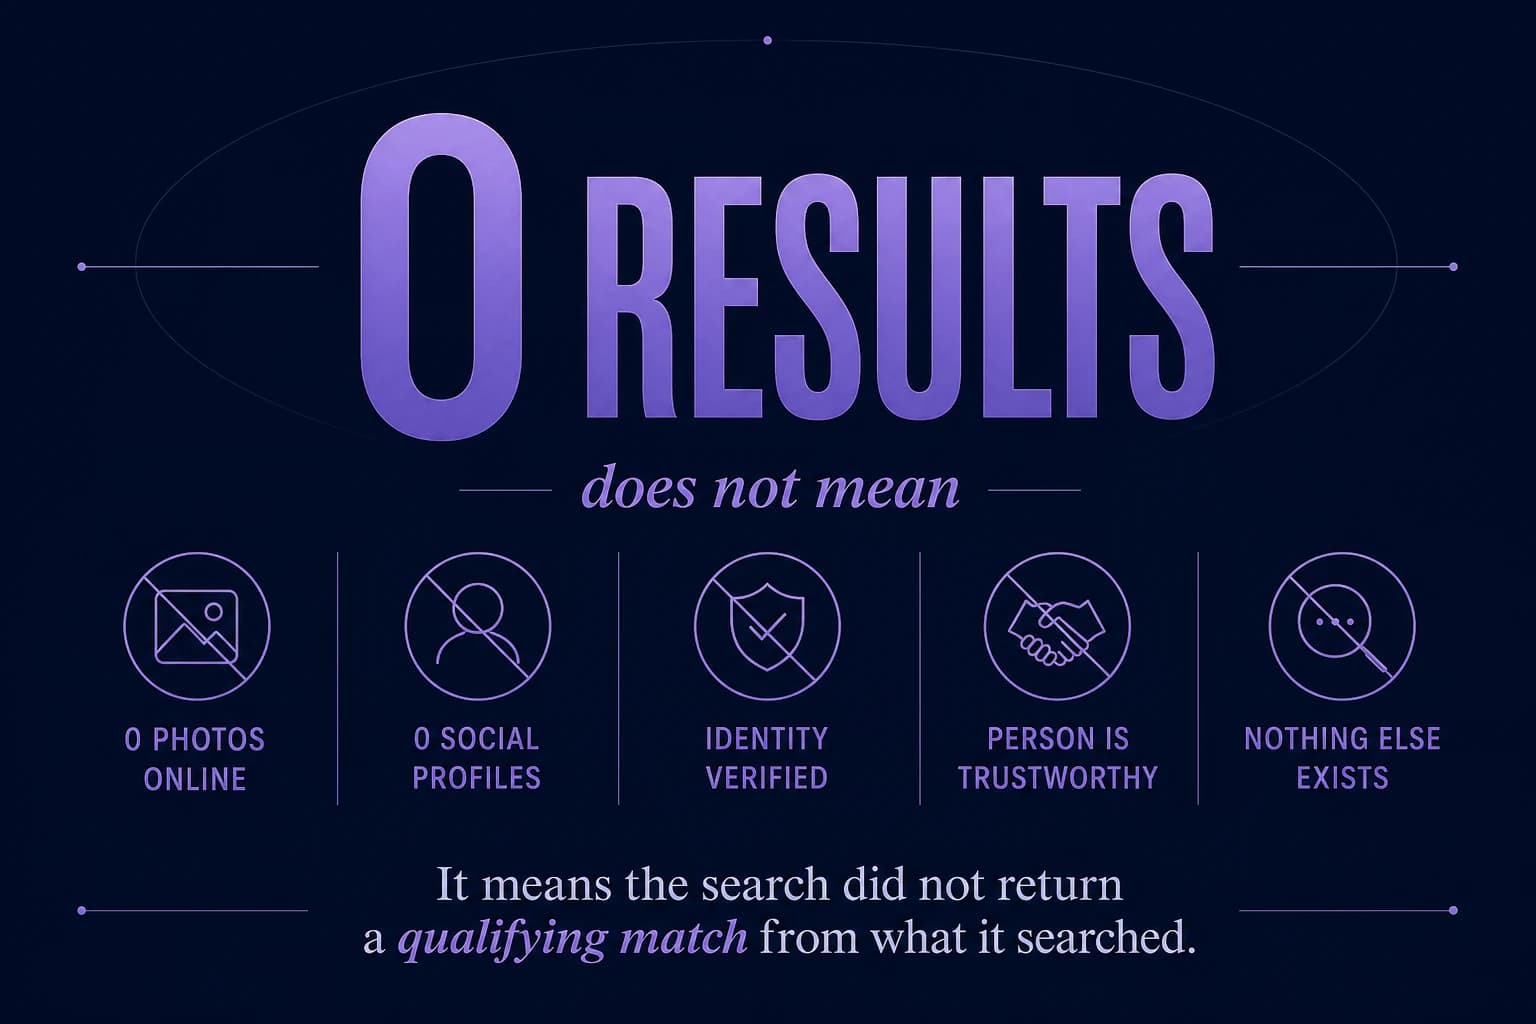
A reverse image search only searches what that particular system can retrieve from its index.
Likewise, face search only searches the resources available to that system.
A photograph can exist online without appearing in your results.
It may not have been indexed. It may exist somewhere the provider doesn't cover. It may be restricted from crawling. Or the search simply may not connect it strongly enough to your source image.
For the face-search version of this idea, see No Face Search Results? What That Actually Means.
What if you find a photo you want removed?
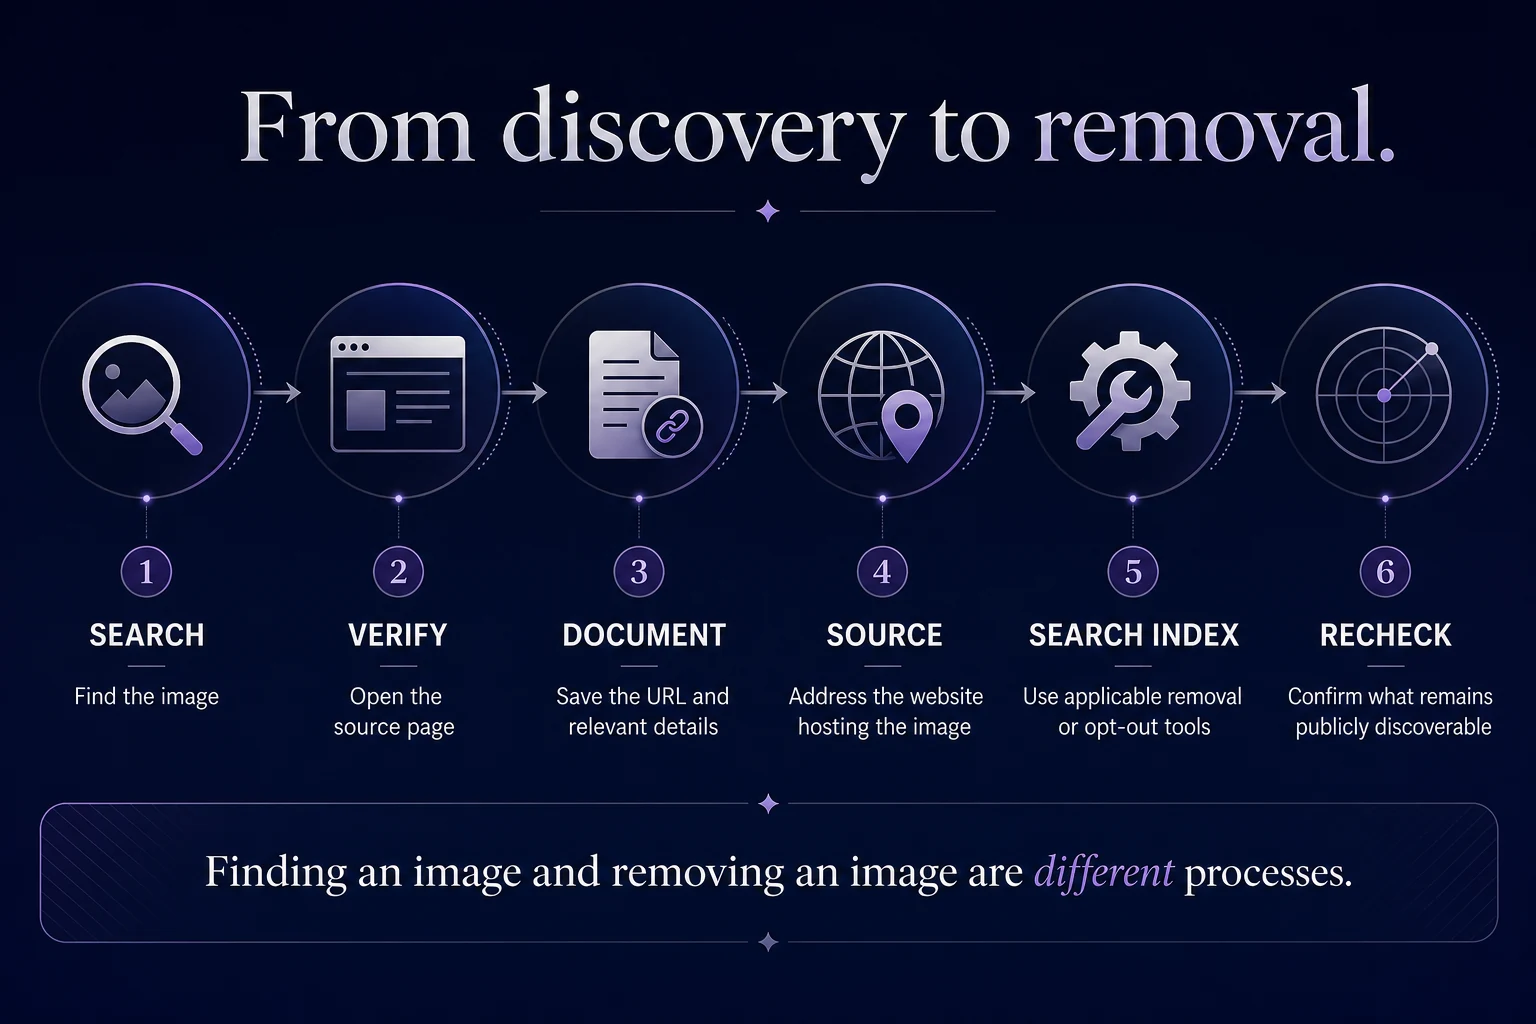
Finding it is step one.
Removal is a separate process.
Start with the website hosting the image.
If you control the account or page, remove or restrict the image there first.
If someone else hosts it, look for the site's privacy, removal, copyright, abuse, or contact process appropriate to your situation.
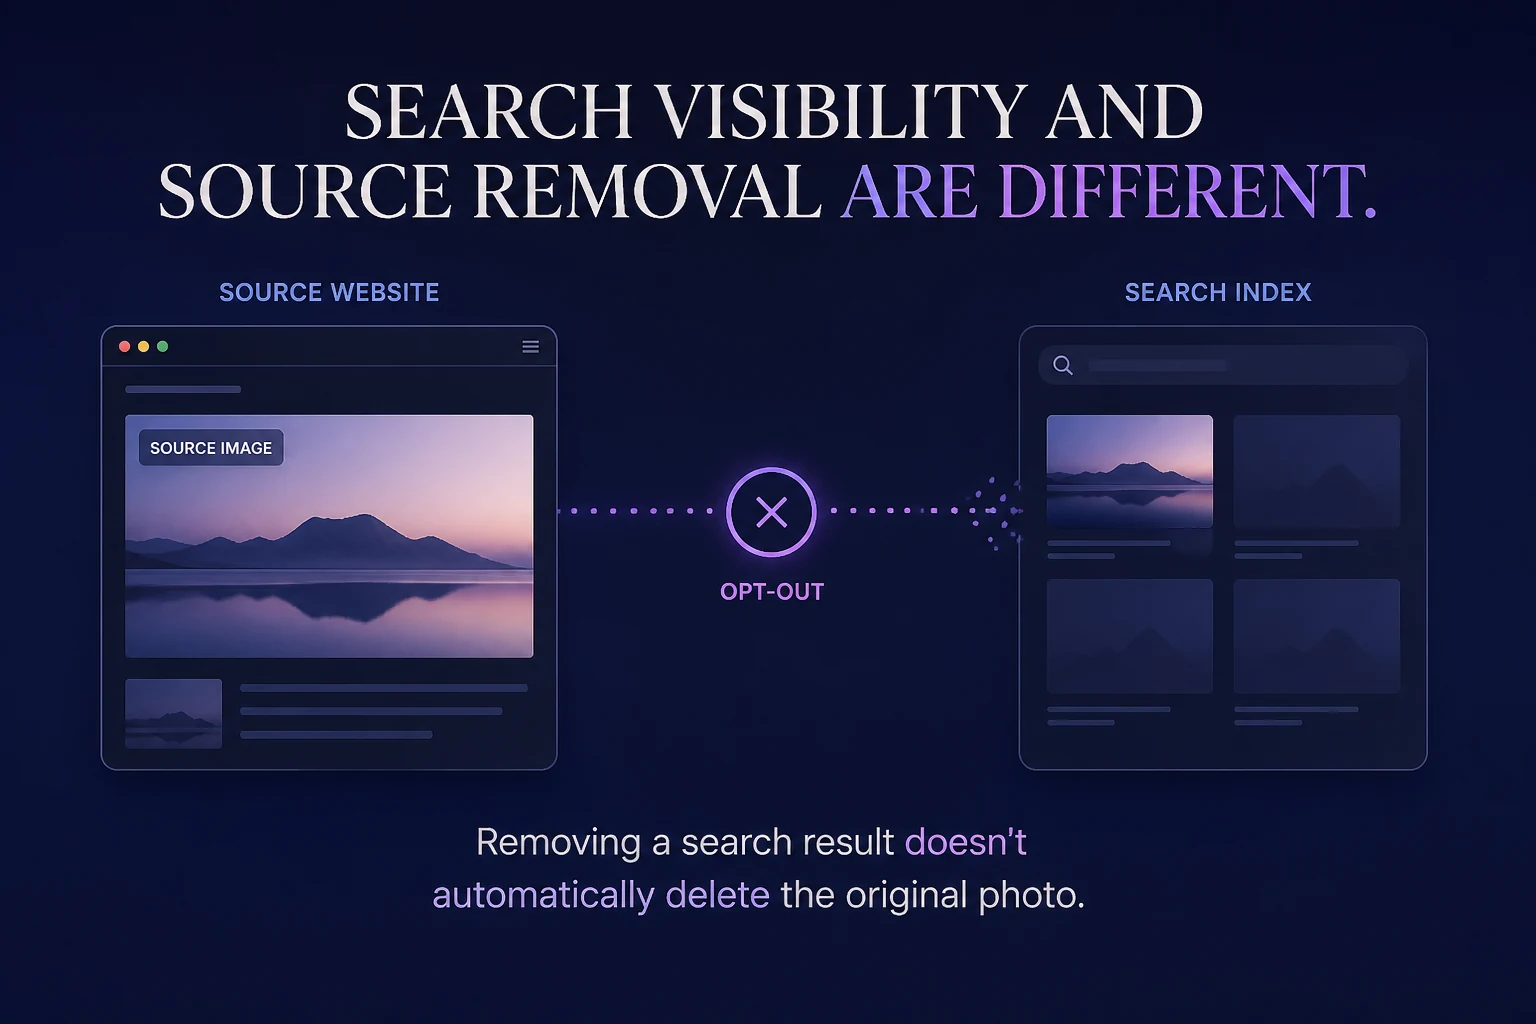
After the source is removed or changed, search engines may still need time to update their indexes. Some services also provide their own removal or opt-out mechanisms.
CatchAFace maintains step-by-step Opt-Out Guides covering major face-search and image-search services.
Quick search checklist
Trying to find your photos online?
Search your name and old usernames.
Run the original photo through multiple reverse-image engines.
Try versions or crops when useful.
Use face search when you're looking for different photographs of your face.
Open the source page behind interesting results.
Look for earlier sources and repost chains.
Save URLs and relevant details.
Don't interpret zero results as proof that nothing exists.
Follow the image. Then follow the face.
There isn't one search engine that can show you every photograph of yourself online.
That's why a thorough search uses different tools for different questions.
Use text search to follow names and identifiers.
Use reverse image search to trace the photograph itself.
Use reverse face search to look for different publicly indexed photographs containing a visually similar face.
Then follow promising results back to their source.
The internet is too large and too fragmented for any one search to provide a complete map.
But each search gives you another piece of it.
Related Articles
Privacy
How to Remove Your Face From Reverse Face Search Engines
Reverse face-search engines don't all use the same opt-out process. Learn how facial-search removal works, what an opt-out actually removes, and why the original image may require separate action.
11 min read
Face Search
No Face Search Results? What That Actually Means
A reverse face search returned nothing. Does that mean the person has no other photos online? Not necessarily. Here's what zero results actually tells you — and what it doesn't.
7 min read
Face Search
Reverse Face Search vs. Reverse Image Search: What's the Difference?
Reverse face search and reverse image search both begin with a photo, but they look for very different things. Learn how each works, what each can find, and why the distinction matters.
6 min read